Growing Ginger Year-Round in a Greenhouse
I have discovered that nurturing your own ginger root in a controlled greenhouse environment is the ultimate way to bring a spicy, fresh zest to your home cooking throughout the seasons.
The Joy of Greenhouse Ginger
There is something incredibly satisfying about walking into my greenhouse and being met with the subtle, clean scent of tropical greenery. Growing ginger has become one of my favorite projects because it bridges the gap between functional gardening and beautiful home aesthetics. The foliage itself is quite striking, resembling a miniature bamboo forest that adds a lush, vertical element to my shelves. I find that having a continuous supply of fresh ginger is a game-changer for a well-stocked kitchen. Unlike the dried, fibrous roots often found at the grocery store, homegrown ginger—especially when harvested young—is tender, juicy, and remarkably potent. It adds a sophisticated layer of flavor to my morning teas and evening stir-fry dishes without the need for a trip to the market. For more on the basics of this zesty plant, you can explore [The Zesty Ginger Guide—All You Need to Know About Growing, Harvesting, Cooking, and Eating Delicious Ginger - Food Gardening Network](https://foodgardening.mequoda.com/articles/the-zesty-ginger-guide-all-you-need-to-know-about-growing-harvesting-cooking-and-eating-delicious-ginger/).
From the TopShelf kitchen
Here are a few recipes and other recommendations from the TopShelf team.
 Continue exploring
The Year's Most Popular Seasonal Recipes: 12 Crowd-Pleasing Dishes (One for Each Month) with Grilling & Campfire Twists
A month-by-month roundup of 12 of the most-searched seasonal hits and how to transform each for the grill, smoker, or campfire. Practical adaptation tips, smart swaps, make‑ahead notes, and plating ideas to elevate outdoor gatherings year-round.
Read more →
Continue exploring
The Year's Most Popular Seasonal Recipes: 12 Crowd-Pleasing Dishes (One for Each Month) with Grilling & Campfire Twists
A month-by-month roundup of 12 of the most-searched seasonal hits and how to transform each for the grill, smoker, or campfire. Practical adaptation tips, smart swaps, make‑ahead notes, and plating ideas to elevate outdoor gatherings year-round.
Read more →
 From the TopShelf kitchen
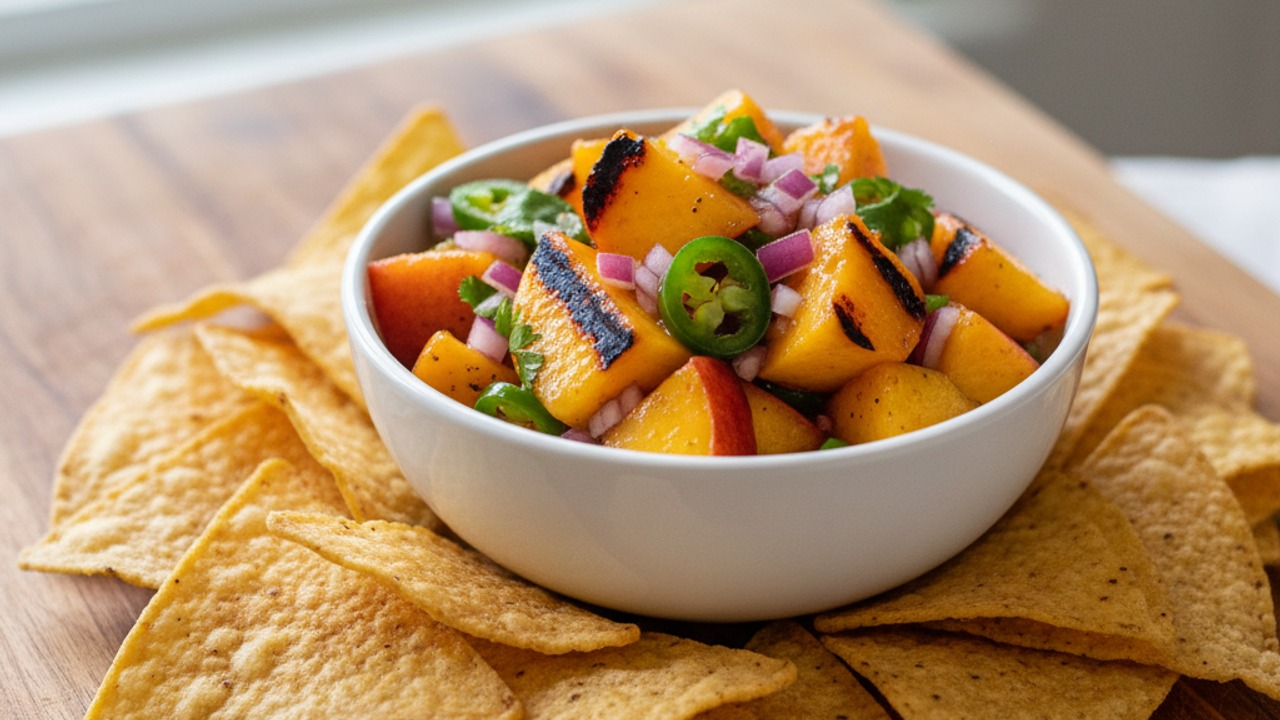
Fresh Peach Salsa
A bright, slightly charred peach salsa that pairs perfectly with grilled fish, chicken, tacos or simply tortilla chips. Quick to make on the grill or a grill pan, it balances sweet ripe peaches with zesty lime, spicy jalapeño and fresh cilantro for a summertime burst of flavor.
View the recipe →
From the TopShelf kitchen
Fresh Peach Salsa
A bright, slightly charred peach salsa that pairs perfectly with grilled fish, chicken, tacos or simply tortilla chips. Quick to make on the grill or a grill pan, it balances sweet ripe peaches with zesty lime, spicy jalapeño and fresh cilantro for a summertime burst of flavor.
View the recipe →
Selecting High Quality Rhizomes
Successful ginger cultivation starts with the right foundation. While you can technically grow ginger from store-bought roots, I always look for organic options to ensure they haven't been treated with growth inhibitors. I prefer rhizomes that look plump and firm with smooth skin, rather than those that are shriveled or dry. I look for specific features when choosing my starting material to ensure the best possible start for my greenhouse garden. Here are the key indicators I look for in a healthy rhizome: - **Visible Growth Buds**: Look for several small, greenish-white nubs or 'eyes' on the ends of the root fingers, as these are where the new stalks will emerge.
- **Firm Texture**: Give the ginger a gentle squeeze; it should feel solid and heavy for its size rather than spongy or hollow.
- **Unblemished Skin**: Avoid any pieces with soft spots, mold, or deep cuts that could invite rot once they are tucked into the soil.
- **Organic Certification**: I always opt for organic rhizomes to avoid chemical sprout-suppressants that are common on conventional grocery store produce.
Creating the Perfect Growth Environment
Because I view my greenhouse as an extension of my home's living space, I prioritize a setup that is both functional and aesthetically pleasing. Ginger is a tropical plant by nature, so it thrives in a setting that mimics a warm, humid forest floor. I find that maintaining a consistent temperature is the most critical factor for success. I use the following environmental targets to keep my ginger plants flourishing throughout the year. By balancing these factors, I can ensure the roots grow thick and the flavor stays bright. The following table outlines my preferred greenhouse settings for ginger: | Attribute | Ideal Range | Function |
| :--- | :--- | :--- |
| Temperature | 75 to 85 degrees F | Encourages active growth and root development |
| Light | Filtered or Indirect | Prevents leaf scorch while providing energy |
| Humidity | 50% to 70% | Keeps the tropical foliage lush and healthy |
| Soil pH | 5.5 to 6.5 | Ensures optimal nutrient absorption from the soil |
Planting Your Ginger for Success
When I am ready to plant, I choose wide, shallow containers rather than deep pots. This is a practical choice because ginger rhizomes grow horizontally, spreading outward rather than downward. A container that is 12 inches wide and about 8 inches deep is usually perfect for starting two or three small pieces of ginger. I make sure my pots have excellent drainage to prevent the roots from sitting in soggy soil, which can quickly lead to rot. I prepare a rich, well-draining potting mix enhanced with plenty of organic compost. I place the rhizomes in the soil with the growth buds or 'eyes' facing upward, covering them with only about 1 to 2 inches of soil. I have learned to resist the urge to bury them too deeply; they prefer to be just beneath the surface. For a more detailed walkthrough of the planting process, I recommend checking [Ginger: How to Plant, Grow, and Harvest Ginger Root | The Old Farmer's Almanac](https://www.almanac.com/plant/ginger). During the first few weeks, I keep the soil consistently moist but never waterlogged. It can take several weeks for the first green shoots to break through the surface, so I remain patient. Once the stalks reach about 3 inches in height, I find it helpful to add a light layer of mulch to help retain moisture and keep the surrounding air humid.
Essential Maintenance and Care
Once my ginger is established, it requires very little daily intervention, which fits perfectly into my busy schedule. I generally check my plants every two days to ensure the soil hasn't dried out completely. Because the greenhouse can get quite warm in the summer, I occasionally mist the leaves to keep the humidity high during the hottest part of the afternoon. I follow a simple routine to keep the plants vibrant and productive. These steps ensure that the energy of the plant is focused on root production rather than just sustaining the leaves: - **Consistent Watering**: I irrigate the plants whenever the top inch of soil feels dry to the touch, ensuring the moisture reaches the root zone.
- **Monthly Feeding**: I apply a balanced, organic liquid fertilizer once a month during the active growing season to provide necessary nutrients.
- **Avoiding Direct Sun**: I position my pots in a spot with bright, filtered light to prevent the leaves from turning yellow or brown at the edges.
- **Monitoring for Pests**: I regularly inspect the underside of the leaves for aphids or spider mites, though ginger is relatively pest-resistant in a clean greenhouse environment.
The Art of the Year-Round Harvest
One of the best secrets of greenhouse growing is that you don't have to wait for the plant to mature fully to enjoy it. I often harvest 'baby ginger' starting around four or five months after planting. This young ginger is bright pink at the tips and has a much milder, less fibrous texture than the mature root. It is perfect for pickling or adding to delicate dressings where you want the flavor without the heat. When I need a bit of ginger, I simply use my fingers to feel around the edge of the pot and locate a piece of the rhizome that has spread outward. I use a small, clean knife to prune off exactly what I need, leaving the rest of the plant to continue growing undisturbed. This 'grab-and-grow' method is the secret to a never-ending supply. For tips on how to perform this without damaging your plant, see [Harvesting Ginger Root: Tips On How And When To Pick Ginger | Gardening Know How](https://www.gardeningknowhow.com/edible/herbs/ginger/harvesting-ginger-roots.htm). If I want mature, spicy ginger, I wait about eight to ten months until the leaves begin to yellow and die back. At this point, the plant has shifted its energy entirely into the root, creating that classic intense flavor we all know and love. In a greenhouse, I can stagger my plantings so that I have both baby ginger and mature ginger available at different times of the year.
Using and Storing Your Harvest
Once I have harvested a beautiful, fresh piece of ginger, I make sure to handle it with care to preserve that wonderful aroma. Fresh greenhouse ginger has a thinner skin than store-bought varieties, so I often don't even bother peeling it—a quick scrub with a clean kitchen brush is usually all it needs. I love finding new ways to incorporate this homegrown treasure into my daily routine and home decor. Whether I am making a soothing beverage or preserving the harvest, I find these methods to be the most effective for a stylish and functional kitchen. For transition tips, I occasionally refer to [How To Grow Ginger Indoors For Year-Round Harvests - House Digest](https://www.housedigest.com/2024557/how-to-grow-ginger-indoors-for-year-round-harvest/): - **Ginger Tea**: I thinly slice a 1 inch piece of ginger and steep it in hot water with a slice of lemon for a calming afternoon drink.
- **Freezing for Longevity**: I wrap unpeeled ginger tightly in compostable wrap and store it in the freezer; it can be easily grated directly into recipes while still frozen.
- **Candied Ginger**: I simmer small cubes of ginger in a simple syrup to create a sweet, spicy treat that doubles as a lovely gift when placed in a chic glass jar.
- **Aromatic Infusions**: I add bruised ginger slices to olive oil or vinegar for a subtle, zesty infusion that looks beautiful displayed in a glass carafe on my counter.